Nexuzhealth KWS Integration
Integrating Tiro.health with Nexuzhealth KWS allows healthcare providers to launch Tiro.health for a selected patient/encounter directly from KWS and save the resulting report back into the KWS system. This integration streamlines workflows and ensures patient data is centralized.
An integration typically has three parts:
-
A context launch from an External Viewer in KWS that allows users to launch Tiro.health inside the KWS application. This launch is handled by a Mirth channel that intercepts the URL and redirects the user to Tiro.health with the necessary patient and encounter context.
-
A report export using Mirth channels that export the completed report back to KWS using the KWS Import XML API, ensuring that the report is stored in the patient's record at the right encounter.
-
A Microsoft Entra ID integration that allows users to authenticate with Tiro.health using their existing hospital credentials. This provides a seamless user experience and ensures that user data is securely managed.
Integration Checklist
The following steps will help you setup the integration between Tiro.health and Nexuzhealth KWS:
- Request Nexuzhealth for a unique application identifier to enable sending reports back to KWS.
- Allow Tiro.health to connect to your hospital's Microsoft Entra ID for user authentication by following the Entra ID integration guide
- Once your data tenant is set up, Tiro.health will invite your hospital's system administrators by email. This email will contain instructions and credentials for your hospital's Tiro.health data tenant.
- Download the Mirth Channels and import them into your Mirth Connect instance. More info below
- Configure the Mirth channels with your hospital's specific settings. More info below
- Set up the KWS External Viewer API to launch Tiro.health with the correct parameters. More info on below
- Test the integration by launching Tiro.health from KWS, choose the demo template and submit a report. More info in next section
User flow
The expected user flow after the integration is completed is as follows:

Step-by-step user flow
-
The user selects a contact in KWS and launches Tiro.health using the configured External Viewer.
-
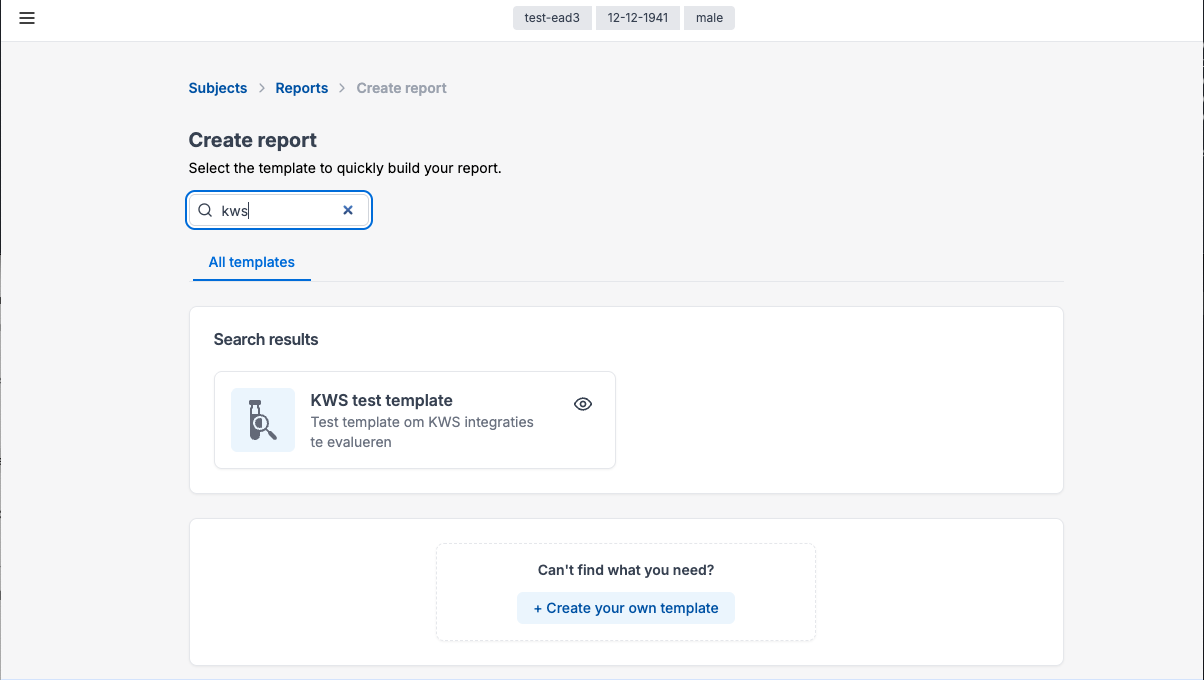
A browser window opens with a context url. The browser redirects to the template picker page in Tiro.health, where the user can select a report template.
-
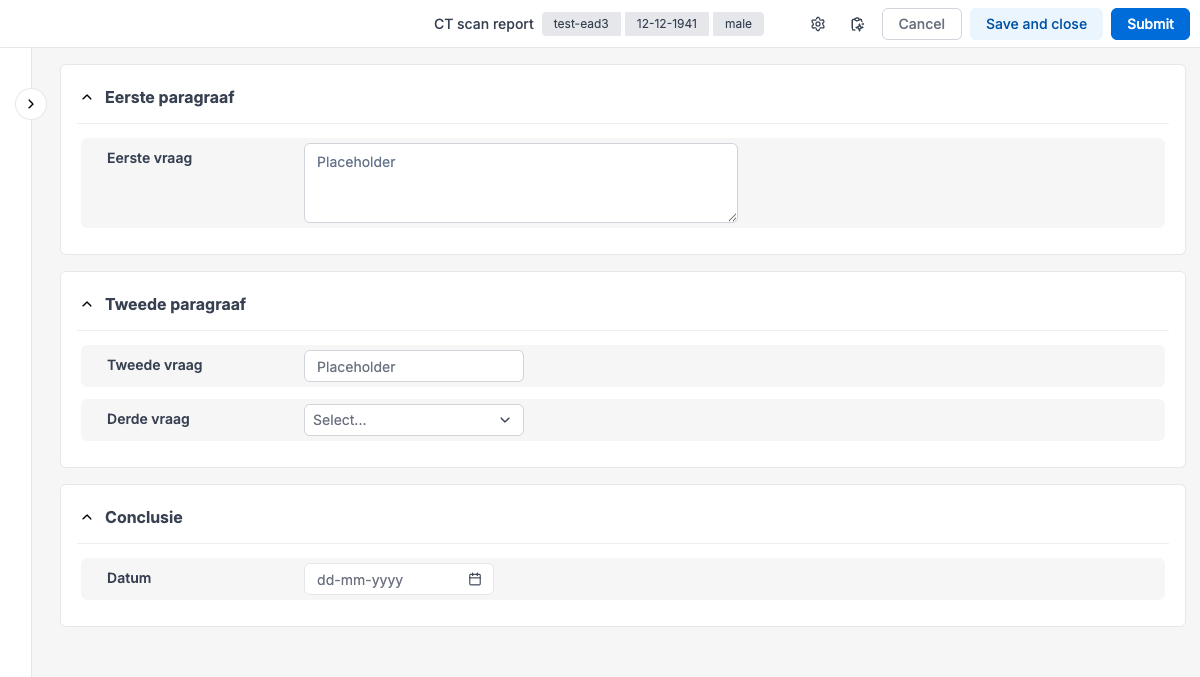
After selecting a template, the user is redirected to the report form page, where they can fill out the form.
 Integration tip: When testing the integration, search for the "KWS test template".
 -
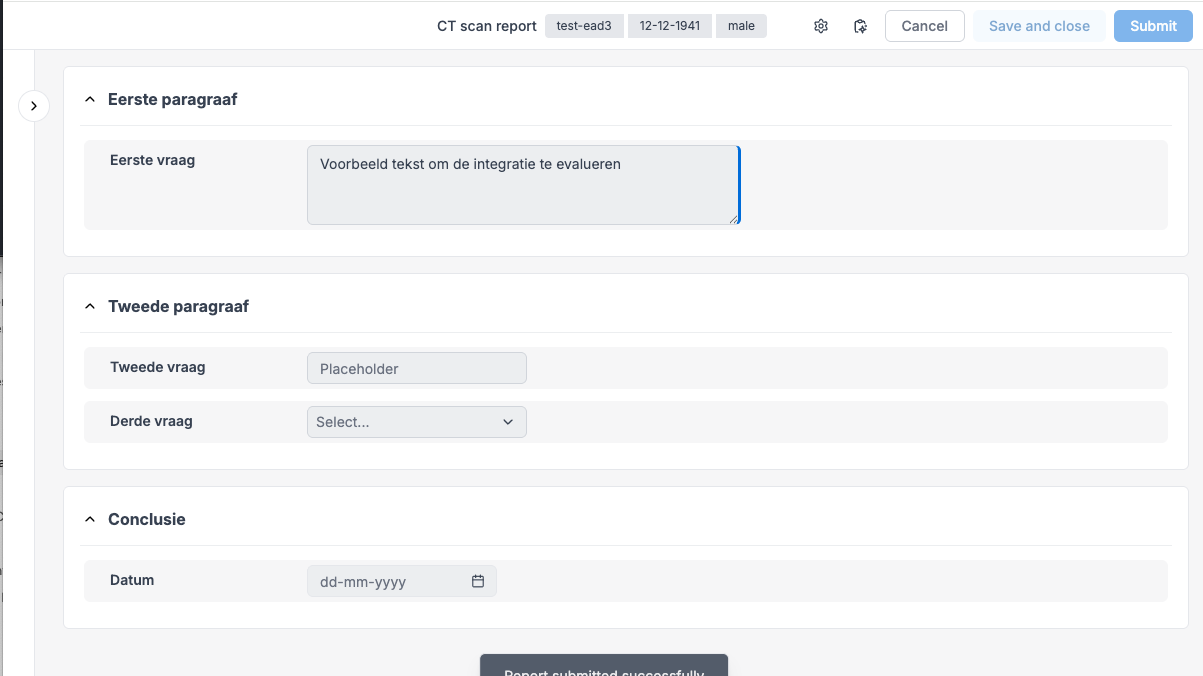
After filling out the form, the user submits the report by clicking on "Submit" (NL: Valideer) in the upper right corner. The report is sent to the Tiro.health backend and stored in the patient's record.
-
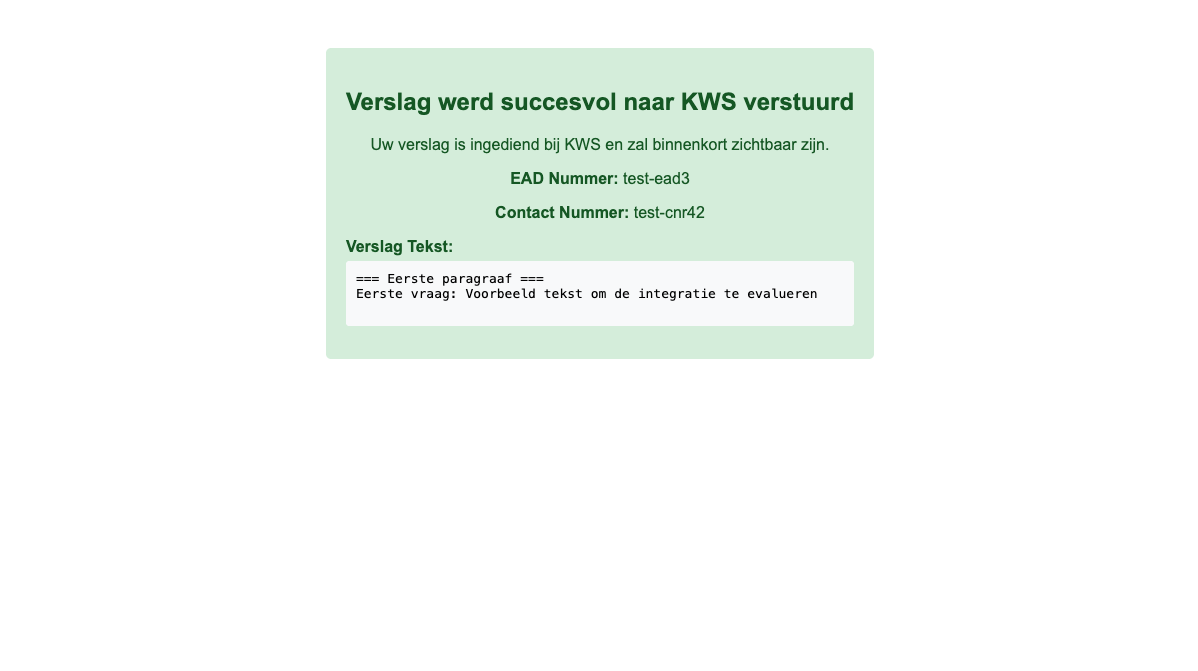
After submission, the user is redirected to a confirmation page in KWS, indicating that the report has been successfully stored in the patient's record.
Please test this flow after completing the integration. If you encounter any issues, please contact us at support@tiro.health
Context Launch
Tiro.health integrates using a KWS External Viewer and makes use of a Mirth channel to process the context parameters in the launch url. The Mirth channel improves data security and user experience.
More info about the Context Launch Channel can be found in the section about Mirth Configuration.
KWS External Viewer Configuration
Important: The webviewer should be made visible to the relevant users (or groups) and with a logical name related to the use case.
The KWS External Viewer API needs to be configured as follows:
-
Base URL: The default base URL is
http://localhost/launch. It's crucial that this URL matches the domain where the Mirth server is running and that the path aligns with the Mirth source listener configuration.Important: Since the URL transmits patient data, ensure the Mirth channel is secured within your intranet or encrypted with TLS to protect sensitive information.
-
Parameters: The following URL parameters are used to pass patient and encounter data from KWS to Tiro.health:
URL Parameter KWS Value Optional / Required patientpatient.eadnrRequired encountercontact.cnrRequired supervisorcontact.supervisor.loginOptional useruser.loginOptional dobpatient.birthDateOptional sexpatient.genderOptional Note: The mapping of these parameters is fully customizable within the Mirth source transformer.
Example of a final URL:
http://localhost/launch/?encounter=test-cnr3&dob=1941-12-12&sex=male&patient=test-ead3&supervisor=andrieskwslogin
With this setup, users can select a contact in KWS and launch directly to app.tiro.health.
Report Export
After a report is submitted in Tiro.health, two Mirth channels work together to retrieve the report and export it back to KWS. This is handled by the Report Export Channels which use the KWS Import XML API to send the report back to KWS.
Hospitals will need to obtain a unique 'application identifier' from Nexuzhealth for this export process.
Currently, only the plaintext human-readable report can be stored in KWS. Nexuzhealth KWS has no documented support for structured FHIR resources like QuestionnaireResponses, Conditions and Procedures. Tiro.health allows hospitals to archive these resources in a structured format in secondary systems like data warehouses or secured network drives. For more information, contact support@tiro.health.
Mirth Configuration
This section is directed towards your Mirth configuration expert and provides an overview of the Mirth channels used in the integration with KWS and general setup instructions for each channel.
Context Launch Channel
This channel intercepts the URL launched from KWS. Context passed in the URL is transformed into an encrypted HTTP POST request to Tiro.health, including patient and encounter context. Tiro.health matches patient and encounter identifiers with existing data in the system, allowing users to continue their work seamlessly. If the match succeeds, the user is redirected to Tiro.health with the appropriate context. An appropriate error message is shown if the match fails.
tiroHealthKwsContextLaunch v1.0.0
Intercept the URL launched from KWS and redirect to Tiro.health with patient and encounter context.
Schematic overview of the context launch channel
sequenceDiagram
    participant C as Browser
    box Mirth
    participant M as tiroHealthKwsContextLaunch
    end
    participant T as Tiro.health (FHIR Server)

    C->>M: Launch URL with Query Parameters
    activate M
    note over M: Source Transformer: Parse URL Query Parameters
    note over M: Destination: import_data_in_atticus
    M->>T: POST /fhir/r5 (FHIR Transaction Bundle: conditional update Patient, Encounter, Practitioner, create Task)
    activate T
    T-->>M: HTTP 200 OK (Success) or HTTP Error (Failure)
    deactivate T

    alt Success (e.g., HTTP 2xx)
        alt New Task
            M-->>C: HTTP 302 Redirect to "Report Creation Page"
        else Update Task
            M-->>C: HTTP 302 Redirect to "Report Edit Page"
        end
    else Failure (e.g., HTTP 4xx/5xx)
        M-->>C: HTTP 302 Redirect to "Error Screen"
    end
    deactivate M
Report Export Channels
These two channels work together to fetch the report submitted in Tiro.health and export it back to KWS using the KWS Import XML API. They ensure that the report is stored in the patient's record using the correct identifiers, allowing for easy access and retrieval.
tiroHealthReportExport v1.0.0
HTTP listener that handles post-submit redirects from Tiro.health and routes the report to tiroHealthKwsImport.
tiroHealthKwsImport v1.0.0
Converts the FHIR bundle returned by Tiro.health into the KWS XML import format and sends it to the KWS API.
Schematic overview of the report export channels
These two Mirth channels work together:
- tiroHealthReportExport — HTTP listener that handles the post-submit redirect from Tiro.health and fetches the report.
- tiroHealthKwsImport — converts the FHIR bundle into KWS XML format and sends it to the KWS API.

Please contact support@tiro.health if you need assistance with the Mirth channel configuration or if you have any questions about the integration process.
Setting Up Configuration Map
The Mirth channels require a configuration map to store environment-specific settings:
- Navigate to Settings > Configuration Map in the Mirth Connect Administrator.
- Extend the configuration map with the following key-value pairs:
| Key | Description | Example Value |
|---|---|---|
tiroHealthAppUrl | Base URL for Tiro.health application | https://app.tiro.health |
tiroHealthClientId | Client ID for Tiro.health API access | my-client-id |
tiroHealthClientSecret | Client secret for Tiro.health API access | my-client-secret |
tiroHealthKwsAppNaam | KWS application identifier for Tiro.health | tiro-health |
tiroHealthKwsZiekenhuis | Hospital identifier for KWS | my-hospital |
tiroHealthKwsHost | KWS XML import endpoint hostname or IP address | 127.0.0.1 |
tiroHealthKwsPort | KWS XML import endpoint port number | 2575 |
tiroHealthPostSubmitPort | Tiro Health Post Submit Port | 8081 |
tiroHealthPostSubmitUrl | Tiro Health Post Submit Url | http://localhost |
tiroHealthServerUrl | Base URL for Tiro.health API | https://reports.tiro.health |
- Click Save to create the configuration map.
You can reference these values in your Mirth channels using the configurationMap object, e.g. configurationMap.get('tiroHealthServerUrl'), in JavaScript code within transformers and filters.
Setting Up SSL for Tiro.health
To ensure secure communication between Mirth Connect and external systems like Tiro.health, you need to configure SSL/TLS settings. This guide focuses on using the NextGen Connect SSL Manager. However, other plugins exists or even using keytool is possible.
- Navigate to Settings in the Mirth Connect Administrator.
- Select the SSL Manager tab.
- Normally, the default java truststore should be sufficient to trust the Tiro.health backend server. However, if that is not the case, you can import the Tiro.health backend server root certificates.
- Click Save Changes to apply the SSL configuration.
Mirth destinations that connect with the Tiro.health backend server can also configure the SSL destination connector. We recommend the following settings:
- 'Server Certificate Validation' should be enabled
- 'Trusted Server Certificates' should be the java truststore or our root certificate that was imported earlier
- 'Hostname Verification' should be enabled
- 'Subject DN validation' should be enabled
- 'Allow expired certificates' should be 'No'
- 'Enabled protocols' should be TLS 1.3 or higher
With the NextGen Advanced Alerting Mirth plugin it is possible to get alerts when the certificate is going to expire. However, this is optional.